 Single Faucet Kegerator Beer Dispensers
 Dual Faucet Two Tap Kegerators
 Triple Faucet Three Tap Kegerators
 Undercounter Built-In Kegerators
 Outdoor Kegerator Beer Dispensers
 ADA Kegerators
 Commercial Kegerators
 Mini Kegerators
 Home Brew Kegerators
 Carbonated Water Kegerators
 Cold Brew & Nitro Coffee Dispenser Kegerators
 15" Kegerators
 Panel Ready Kegerators
 Kombucha Equipment
 Guinness® Dispensing Kegerators
 Wine Kegerators
 Kegerator Cabinets
 Kegerator Covers and Accessories
 Kegerators
 Kegerator Conversion Kits
 Kegs & Keg Accessories
 Beer Faucets
 Beer Shanks
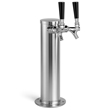 Draft Beer Towers
 Keg Taps Couplers
 Regulators & Gas Equipment
 Beer & Gas Line Hose
 Co2 and Nitrogen Air Tanks
 Beer Line Cleaning Equipment
 Drip Trays
 System Fittings
 Jockey Boxes
 Keg Beer Party Pumps
 Glassware
 Guinness® Dispensing Equipment
 Remote Glycol Systems
 Wine Cooler Refrigerators
 Side by Side Wine Cellars
 Cooling Units
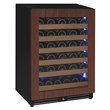 Panel Ready Wine Refrigerators
 Beverage Centers
 Wine Racks
 Wine Dispensing Systems
 Wine Accessories
 Wine Making
 Nitro Hot Draft System
 Ready to Drink Bag-in-a-Box Coffee Dispensing Equipment
 Nitrogen Infusers
 Nitrogen Tanks & Generators
 Nitrogen Beer Regulators
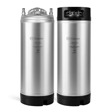 Nitro Cold Brew Coffee Kegs
 Cold Brewed Coffee Tools
 Cleaning Equipment
 Outdoor Appliances
 ADA Appliances
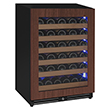 Panel Ready Appliances
 Commercial Grade Appliances
 Refrigerators
 Drawer Refrigerators
 Ice Makers
 Water Dispensers & Accessories
 Freezers
 Home Brew Equipment Kits
 Fermentation Equipment
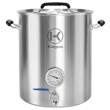 Boiling and Mashing Equipment
 Home Brew Beer Kegs
 Home Brew Kegerator Conversion Kits
 Brewing Tools
 Home Brew Ingredients
 Cleaning Chemicals
 Test Equipment
 Home Brew Beer Bottles and Bottling Equipment
 Brewery Fittings
 Draft Beer Equipment
 Homebrewing Equipment
 Wine Equipment
 Luxury Appliances and Refrigeration
 Coffee Equipment
 Kombucha
 The Beverage Blog
 Frequently Asked Beer Questions
 Shop by Brand
 Shop by Category
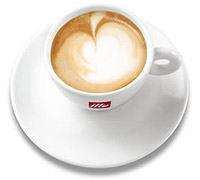
From Milk to Magic: A Guide to Frothing
 Have you ever tasted a cappuccino that simply blew away your taste buds as well as your mind? Chances are this cappuccino reached espresso drink perfection not only because of a well pulled shot but in thanks to flawlessly executed frothed milk. When done right, frothed or steamed milk is decadently rich, creamy, thick and smooth. More often than not, frothed milk is light, airy, and otherwise tasteless. Frothing milk is a mixture of art and skill and while the process may seem intimidating at first, BeveragFactory.com is here to offer an easy to follow step by step guide that will have you frothing fancy lattes in no time! After all, you bought your espresso maker for a reason: to make espresso based drinks. Now is the time to learn how you can take full advantage of your espresso maker’s features. The best way to start is by letting of some steam, and working some milk!
Step 1: Work the Tools
 As a master painter requires the perfect canvas, paintbrush, and paints a budding master of milk frothing requires the right set of tools. To start frothing milk effectively and easily, you will need the following:
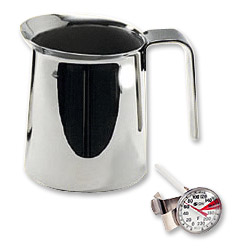
- A method of steaming such as a steam wand on an espresso maker
- Stainless Steel Frothing Pitcher (14-24 ounces) (By the way, we sell them here!)
- Needle Thermometer
- Fresh, Cold, Whole Milk (although you can froth with skim, 1%, 2%, whole just tastes better and froths easier)
Note: If you do not have a fast heating large or double boiler espresso maker, you will want to froth your milk before you pull your shot of espresso.
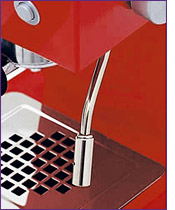
Step 2: Work the Steam
Alright, let us start by heating up your steaming device. For convenience sake, we will assume you are using your espresso maker’s steam wand to froth your milk.
- Turn your espresso maker on and let it heat to steam producing levels. You may notice your steam wand puttering and spitting water out its nozzle. While this does mean your steam wand is ready to go to work, for best results let it run for a bit until it stops spitting and steams “dry.”
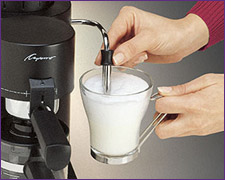
- Next, pour fresh cold milk into your frothing pitcher until it is a little less than 1/3 full and clip your thermometer to the side of the pitcher. Now your two elements are ready to collide!
- Move the frothing pitcher filled with milk up to the frothing wand. Immerse the wand in the milk so it nearly reaches the bottom of the pitcher.
- As bubbles begin to form, you will want to slowly move your frothing pitcher downwards so that your wand is hovering just between the surface of the milk and the layer where bubbles and foam are starting to form.
Your key to determining if your wand’s location is correct is by listening to the sound your milk makes. If the sound reminds you of a little boy blowing bubbles through a straw into his milk, your wand is too high. However, if the sound resembles a deep rumbling you are on the right path! At this point, your thermometer should read around 100º F and your milk appears to be increasing in volume.
 Step 3: Work the Wand
Now that your thermometer has reached 100º F and the volume of your milk continues to increase you have to be aware of continuously moving the frothing pitcher downwards in order to keep the tip of the frothing wand in between your milk and your foam that is beginning to form. At this point it is crucial that you never break the surface of the milk with your frothing wand.
Step 4: Work the Temperature
Watch your thermometer; it should be creeping up towards 130º F. Once it reaches this temperature, move your frothing wand pitcher so that the steam wand is half way into the real milk and continue frothing until your thermometer reads 155º F. 155º F is your temperature indicator to finish up your froth. Remove the pitcher from the frothing wand and swirl or tap your pitcher against your counter to remove any air bubbles that may have formed.
 Step 5: Work the Pour
So you have carefully maneuvered your frothing pitcher with your frothing wand and watched the temperature creep up to the magic milk frothing heights of 155º F. You should be left with a thick and creamy mixture that requires no spoon when you pour. If you do not need to spoon out any of your freshly frothed milk, you have successfully achieved the artistic heights of milk frothing! If you are not quite there yet, never fear! Frothing milk is skill many café’s baristas never fully master. This is not due so much to the difficulty of frothing, but more to lack of instruction and knowledge. We at the BeverageFactory.com are your key to frothing enlightenment!