 Single Faucet Kegerator Beer Dispensers
 Dual Faucet Two Tap Kegerators
 Triple Faucet Three Tap Kegerators
 Undercounter Built-In Kegerators
 Outdoor Kegerator Beer Dispensers
 ADA Kegerators
 Commercial Kegerators
 Mini Kegerators
 Cold Brew & Nitro Coffee Dispenser Kegerators
 Home Brew Kegerators
 Carbonated Water Kegerators
 15" Kegerators
 Kombucha Equipment
 Guinness® Dispensing Kegerators
 Wine Kegerators
 Kegerator Cabinets
 Kegerator Covers and Accessories
 Kegerators
 Kegerator Conversion Kits
 Kegs & Keg Accessories
 Beer Faucets
 Beer Shanks
 Draft Beer Towers
 Keg Taps Couplers
 Regulators & Gas Equipment
 Beer & Gas Line Hose
 Co2 and Nitrogen Air Tanks
 Beer Line Cleaning Equipment
 Drip Trays
 System Fittings
 Jockey Boxes
 Keg Beer Party Pumps
 Glassware
 Guinness® Dispensing Equipment
 Remote Glycol Systems
 Wine Cooler Refrigerators
 Wine Cellar Cabinets
 Wine Racks
 Cooling Units
 Wine Dispensing Systems
 Wine Accessories
 Wine Making
 Nitro Hot Draft System
 Ready to Drink Bag-in-a-Box Coffee Dispensing Equipment
 Nitrogen Infusers
 Nitrogen Tanks & Generators
 Nitrogen Beer Regulators
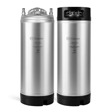 Nitro Cold Brew Coffee Kegs
 Cold Brewed Coffee Tools
 Cleaning Equipment
 Outdoor Appliances
 ADA Appliances
 Panel Ready Appliances
 Commercial Grade Appliances
 Beverage Centers
 Refrigerators
 Drawer Refrigerators
 Ice Makers
 Water Dispensers & Accessories
 Freezers
 Home Brew Equipment Kits
 Fermentation Equipment
 Boiling and Mashing Equipment
 Home Brew Beer Kegs
 Home Brew Kegerator Conversion Kits
 Brewing Tools
 Home Brew Ingredients
 Cleaning Chemicals
 Test Equipment
 Home Brew Beer Bottles and Bottling Equipment
 Brewery Fittings
 Draft Beer Equipment
 Homebrewing Equipment
 Wine Equipment
 Luxury Appliances and Refrigeration
 Coffee Equipment
 Kombucha
 The Beverage Blog
 Frequently Asked Beer Questions
 Shop by Brand
 Shop by Category


September 02, 2017
With more people making the switch from sugary sodas to healthier carbonated beverages and experimenting with their own recipes at home, you probably know many people with commercial carbonation systems like the SodaStream®, and may have even considered buying one of your own. While these store-bought systems can be a convenient way to get started enjoying your own homemade beverages, you may be surprised to learn that it's easier than you think to build your own carbonation system. Not only are these DIY systems fun to build, but they are also much more versatile and cheaper to operate and maintain.
Unlike systems that require proprietary bottles and small CO2 canisters that cannot be easily refilled and must be repurchased frequently, DIY carbonation systems utilize standard CO2 tanks of any size that can be refilled locally at a fraction of the cost, and are compatible with any plastic bottle that uses a standard bottle cap. While the SodaStream® is only designed to carbonate water and requires you to purchase expensive ingredients in order to flavor it, by experimenting with different levels of carbonation you can use your DIY carbonation system to carbonate juice, tea, wine, and other beverages.
YOU WILL NEED:
- A CO2 gas tank, available in a wide variety of sizes to best fit your needs. These can be easily refilled at your local welding supply store or other gas suppliers.
- A CO2 gas regulator. This attaches directly to your CO2 tank, allowing you to control the flow of gas from the tank into your bottle. Investing in a dual gauge regulator instead of a single gauge regulator will allow you to see how much CO2 is left in your tank, so you won't have to worry about running out unexpectedly before a big party.
- A length of vinyl tubing. We use 5 feet of 5/16" I.D. vinyl air line with hose clamps to connect the CO2 regulator to the ball lock keg coupler.
- A "gas in" ball lock keg coupler This connects to the other end of your vinyl tubing, and prevents gas from being released until the coupler is connected to the carbonation cap. Be sure to purchase a "gas in" ball lock keg coupler rather than a "beer out" ball lock keg coupler.
- A carbonation cap. Specially designed to screw onto any plastic bottle with standard cap threading, it makes it easy to carbonate your bottles without leaking any CO2.
- A standard plastic bottle. Any bottle with standard cap threading (like you would find on a 2-liter bottle of soda) will work with this system.
HOW IT WORKS:
-
Attach the filled CO2 tank, CO2 regulator, vinyl tubing, and ball lock keg coupler together. Open the valve on the CO2 tank but leave the valve on the CO2 regulator closed. Depending on the type of liquid you are carbonating and your desired level of fizziness, you will need to adjust the pressure adjustment knob on your regulator until the top gauge displays the desired pressure between 35-50 PSI.
-
Fill your bottle with a cold beverage. CO2 dissolves more easily in cold liquid, so the colder the better. Be sure to leave about 2-1/2 inches empty to allow room for the CO2.
-
Squeeze out any extra air in the bottle until the liquid reaches the top, then screw the carbonation cap onto the bottle.
-
Snap the coupler onto your carbonation cap. Open the valve on the regulator to allow CO2 to flow into your bottle. It will happen instantly.
-
Shake the bottle for 20-30 seconds to ensure that the CO2 has dissolved throughout the liquid. If you do not properly shake the bottle, the CO2 will remain at the top of the bottle and your beverage will not be fizzy.
WARNING: Be sure to shake your bottle cap-side up, NOT upside down. We once had a customer who shook his bottle upside down, which backflowed liquid into his gas line and possibly into his regulator. Luckily, it did not break his regulator. Unluckily, our sales associate that troubleshot the issue discovered the problem when the liquid sprayed all over his shirt!
-
Close the gas valve. Remove the keg coupler and the carbonation cap and enjoy your newly carbonated beverage!
-
Store your carbonated beverages under pressure to keep them carbonated. You can use the carbonation cap to keep your beverages carbonated or to re-carbonate a flat beverage.