 Single Faucet Kegerator Beer Dispensers
 Dual Faucet Two Tap Kegerators
 Triple Faucet Three Tap Kegerators
 Undercounter Built-In Kegerators
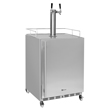 Outdoor Kegerator Beer Dispensers
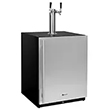 ADA Kegerators
 Commercial Kegerators
 Mini Kegerators
 Home Brew Kegerators
 Carbonated Water Kegerators
 Cold Brew & Nitro Coffee Dispenser Kegerators
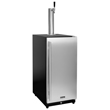 15" Kegerators
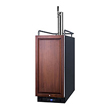 Panel Ready Kegerators
 Kombucha Equipment
 Guinness® Dispensing Kegerators
 Wine Kegerators
 Kegerator Cabinets
 Kegerator Covers and Accessories
 Kegerators
 Kegerator Conversion Kits
 Kegs & Keg Accessories
 Beer Faucets
 Beer Shanks
 Draft Beer Towers
 Keg Taps Couplers
 Regulators & Gas Equipment
 Beer & Gas Line Hose
 Co2 and Nitrogen Air Tanks
 Beer Line Cleaning Equipment
 Drip Trays
 System Fittings
 Jockey Boxes
 Keg Beer Party Pumps
 Glassware
 Guinness® Dispensing Equipment
 Remote Glycol Systems
 Wine Cooler Refrigerators
 Side by Side Wine Cellars
 Cooling Units
 Panel Ready Wine Refrigerators
 Beverage Centers
 Wine Racks
 Wine Dispensing Systems
 Wine Accessories
 Wine Making
 Nitro Hot Draft System
 Ready to Drink Bag-in-a-Box Coffee Dispensing Equipment
 Nitrogen Infusers
 Nitrogen Tanks & Generators
 Nitrogen Beer Regulators
 Nitro Cold Brew Coffee Kegs
 Cold Brewed Coffee Tools
 Cleaning Equipment
 Outdoor Appliances
 ADA Appliances
 Panel Ready Appliances
 Commercial Grade Appliances
 Refrigerators
 Drawer Refrigerators
 Ice Makers
 Water Dispensers & Accessories
 Freezers
 Home Brew Equipment Kits
 Fermentation Equipment
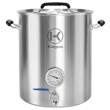 Boiling and Mashing Equipment
 Home Brew Beer Kegs
 Home Brew Kegerator Conversion Kits
 Brewing Tools
 Home Brew Ingredients
 Cleaning Chemicals
 Test Equipment
 Home Brew Beer Bottles and Bottling Equipment
 Brewery Fittings
 Draft Beer Equipment
 Homebrewing Equipment
 Wine Equipment
 Luxury Appliances and Refrigeration
 Coffee Equipment
 Kombucha
 The Beverage Blog
 Frequently Asked Beer Questions
 Shop by Brand
 Shop by Category


October 13, 2017
Ready to take your love of wine to the next level? It's time to consider cutting out the middle man and making your own! When you think of the art of winemaking, you may think of sprawling vineyards in France and Italy, ancient wine cellars, and dusty old oak barrels, but the reality is much closer to home. With just a few simple ingredients, some basic equipment, and a little know-how, you can begin your journey to becoming a master winemaker in your own backyard! Read more to find out how to enjoy delicious and inexpensive wine by the gallon in just a few short months.
You will need the following equipment. Make sure that all equipment has been thoroughly sanitized and rinsed clean before using.
- >Plastic bucket
- Large fine mesh straining bag
- Wine thief
- Test jar
- Titration kit
- Hydrometer and Thermometer (a Hydrometer/Thermometer Combo is even better!)
- Racking cane or about 6 feet of clear 1/2" plastic tubing
- Large mixing spoon
- Glass carboys
- Bungs
- Airlocks
- Wine bottles (about 5 bottles per gallon) and corks
- Hand corker
You will also need the following ingredients:
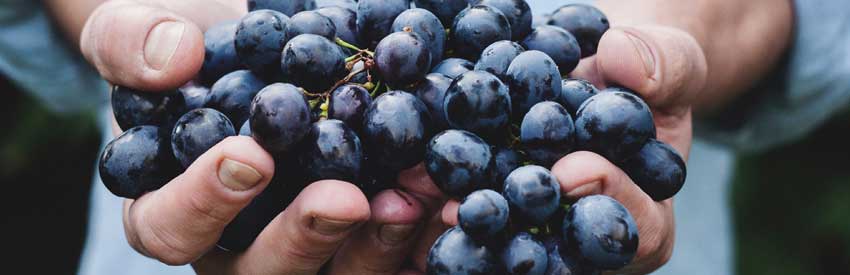
- Wine grapes. 1kg yields about 1 liter of juice, so we recommend using about 19 kg for a 5 gallon batch. When selecting your grapes, make sure to toss any rotten looking grapes and remove the stems as they can make your wine bitter. You can lightly rinse your grapes if you wish, but this is not usually necessary as any bacteria will be killed off later in the process.
- Campden tablets (potassium or sodium metabisulphite)
- Tartaric acid
- Granulated sugar
- Filtered water
- Wine yeast
- You may also need a clarifier like bentonite or isinglass
PRIMARY FERMENTATION
- In a plastic bucket, crush your grapes to release the juice, called "must".
- If you are making white wine, you will need to strain the juice through a straining bag to remove the skins. If you are making red wine, leave the skins in the juice, as this is what gives red wine its deep color.
- Add one crushed Campden tablet per gallon of juice and stir. Cover with a clean cloth and leave for at least 24 hours to allow the tablets to kill off any bacteria or wild yeast.
- Use a wine thief to collect samples in a test jar for testing. Make sure to only collect the juice and not any of the skins, as they can throw off your measurements.
- Use a titration kit to measure the acidity of the must. The ideal acid level is 6-7 grams per liter for dry reds and 6.5 to 7.5 grams per liter for dry whites. Add tartaric acid in 1/8 teaspoon intervals, measuring after every addition, until you have reached the desired acid level.
- Use a hydrometer to take a reading of the must. If it is less than 24 Brix sugar density, you may need to add sugar to boost the alcohol levels.
- When adding sugar, dissolve granulated sugar in a minimal amount of filtered water, add to the must, and stir. Make sure not to add too much water, as this can dilute the juice.
- After at least 24 hours have passed, it is time to add the wine yeast. You can sprinkle the yeast onto the must straight from the packet, but for best results, we recommend first reconstituting the yeast to ensure that the yeast is healthy and strong. Pour the yeast into about a cup of 103° water, then allow it to sit for about 15 minutes until it begins foaming. Then, slowly add a little must to it at a time until the temperature drops to within 10° of the large batch of must. You can then add the yeast mixture to the rest of the must, gently stir, and cover with a clean cloth.
- After about a day, the mixture should begin fizzing and frothing. Leave for 7-10 days in a relatively cool location (about 65-72° Fahrenheit or 18-22° Celsius) that is well ventilated. Do not ferment in small spaces like closets, as the process gives off carbon dioxide that can be dangerous in enclosed spaces. Backyards can be a great option if you have a cool, shaded area.
- Make sure to regularly monitor the progress of the fermentation, paying careful attention to the temperature to ensure that it does not get over 85°. You may need to cool your fermenting wine in a refrigerator if it is getting too warm.
- If you are making red wine, you will need to use a large spoon to push down the "cap" of skin twice daily.
After at least 24 hours
FINISHING FERMENTATION
- After about a week, the primary fermentation period will have ended and a sediment will have formed. You can now strain the skin from the red wine and transfer the liquid into clean glass carboys.
- For white wine, use a plastic tube or a racking cane to siphon the liquid into clean glass carboys, making sure not to disturb the sediment or siphon it up along with the wine.
- Try to fill the carboys to the top to reduce the amount of air your wine is being exposed to. Add a bung and an airlock, and half fill the airlock with water.
RACKING
- Once this stage of fermentation has ended and the liquid is no longer fizzing or bubbling, it is now time to "rack", or transfer, the wine.
- Use plastic tubing or a racking cane to siphon the liquid into clean glass carboys, making sure not to disturb the sediment or siphon it up along with the wine. Continue fermenting for 2-3 months.
- After this time, a second sediment will have formed. Siphon the wine from the sediment until it is running clear. If you have white wine that is not clearing over time, you may need to filter it or add a clarifier like bentonite or isinglass.
BOTTLING
- Once the liquid has cleared, taste your wine before bottling to decide if you would like it sweeter. If you do, make sure to add sweetener slowly and re-taste frequently to avoid over-sweetening.
- Add additional campden tablets to your wine before bottling to ensure that fermentation does not begin again.
- Use plastic tubing or a racking cane to fill the sterilized bottles with wine, leaving about 1/2" to ¾" of headspace below the rim for the cork.
- Insert sanitized corks using a hand corker, and leave upright for 2 hours.
- After 2 hours, you can now store the bottles upside down or on their sides to ensure that the corks do not dry out, which would allow oxygen to enter the bottles and spoil your wine. Wine racks are a great way to properly store your new homemade wine collection!
- In general, you can age your homemade wine 3-6 months for white wine or 6 months to a year for red wine, but the best indicator of when to drink your wine is your own taste buds!

Once you've unlocked the basics of winemaking, the possibilities are endless! You can try making wine from other fruits, such as plums or strawberries, or try experimenting with additives like oak and elderberries to bring out even more flavors. We'll leave you with one final warning: once your friends and family hear about your new hobby, you may need to start hiding a few bottles to keep for yourself!