 Single Faucet Kegerator Beer Dispensers
 Dual Faucet Two Tap Kegerators
 Triple Faucet Three Tap Kegerators
 Undercounter Built-In Kegerators
 Outdoor Kegerator Beer Dispensers
 ADA Kegerators
 Commercial Kegerators
 Mini Kegerators
 Home Brew Kegerators
 Carbonated Water Kegerators
 Cold Brew & Nitro Coffee Dispenser Kegerators
 15" Kegerators
 Panel Ready Kegerators
 Kombucha Equipment
 Guinness® Dispensing Kegerators
 Wine Kegerators
 Kegerator Cabinets
 Kegerator Covers and Accessories
 Kegerators
 Kegerator Conversion Kits
 Kegs & Keg Accessories
 Beer Faucets
 Beer Shanks
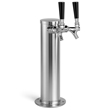 Draft Beer Towers
 Keg Taps Couplers
 Regulators & Gas Equipment
 Beer & Gas Line Hose
 Co2 and Nitrogen Air Tanks
 Beer Line Cleaning Equipment
 Drip Trays
 System Fittings
 Jockey Boxes
 Keg Beer Party Pumps
 Glassware
 Guinness® Dispensing Equipment
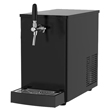 Remote Glycol Systems
 Wine Cooler Refrigerators
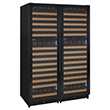 Side by Side Wine Cellars
 Cooling Units
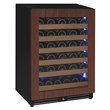 Panel Ready Wine Refrigerators
 Beverage Centers
 Wine Racks
 Wine Dispensing Systems
 Wine Accessories
 Wine Making
 Nitro Hot Draft System
 Ready to Drink Bag-in-a-Box Coffee Dispensing Equipment
 Nitrogen Infusers
 Nitrogen Tanks & Generators
 Nitrogen Beer Regulators
 Nitro Cold Brew Coffee Kegs
 Cold Brewed Coffee Tools
 Cleaning Equipment
 Outdoor Appliances
 ADA Appliances
 Panel Ready Appliances
 Commercial Grade Appliances
 Refrigerators
 Drawer Refrigerators
 Ice Makers
 Water Dispensers & Accessories
 Freezers
 Home Brew Equipment Kits
 Fermentation Equipment
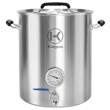 Boiling and Mashing Equipment
 Home Brew Beer Kegs
 Home Brew Kegerator Conversion Kits
 Brewing Tools
 Home Brew Ingredients
 Cleaning Chemicals
 Test Equipment
 Home Brew Beer Bottles and Bottling Equipment
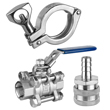 Brewery Fittings
 Draft Beer Equipment
 Homebrewing Equipment
 Wine Equipment
 Luxury Appliances and Refrigeration
 Coffee Equipment
 Kombucha
 The Beverage Blog
 Frequently Asked Beer Questions
 Shop by Brand
 Shop by Category


January 07, 2021

The new year is a time to learn new skills and start new adventures. We think learning to brew is an essential skill and it's so satisfying to enjoy your hard work. Before you get started, we wanted to offer you some useful advice from our team of homebrewing experts. Waste less time and energy with these starter tips that the books don't tell you about. With over 20 years of experience in the brewing industry, we've picked up a lot of tricks for making the brewing process easier.
1. Get the bigger kettle
Whether you're purchasing a homebrew starter kit or all your equipment individually, getting a larger brew kettle will future proof your brewing setup. Check out our article on the Ultimate Homebrew Starter Kit Guide here. If you ever plan on getting into all-grain brewing, you're going to need a larger kettle. Learn about the difference between extract and all-grain homebrewing in our article here. Also, a larger kettle prevents your kettle from boiling over. Trust us, instead of replacing your smaller kettle for a larger one, just start with a larger brew pot to eliminate the hassle and waste of money.
2. Wort chillers are worth it
The best thing you can do to prevent contamination of your wort is to chill it down rapidly, which is why a wort chiller is essential! The cost efficient method of an ice bath can still take anywhere from 40 minutes to over an hour. Additionally, you will need a very large vessel to place your kettle into to chill. Save your time and energy by using a wort chiller, which can typically chill 5 gallons of wort in 20 minutes or less! Simply hook a cold-water source up to the immersion chiller, and add the chiller to your kettle for the last 10 minutes of your boil to sanitize it. FInally, turn on the water after you've removed your kettle from the heat source and your chiller handles the rest.
3. Get the bigger auto-siphon
Many beginner's start with a 5/16" auto-siphon but for several dollars more you can upgrade to a larger ½" racking cane, which will significantly reduce your liquid transfer time. This time saving larger autio-siphon is worth the few extra bucks and as you continue to brew, you'll thank us for saving you all this time!
4. Make your own yeast starter
When your whole brewing process relies on your yeast, you want to ensure you are starting your brew off right. Creating your own yeast starter ensures you complete control over the resulting brew and it only takes about 20 minutes to do! Homemade yeast improves your chances of getting a strong, active primary fermentation phase and also reduces your chances for contamination.
5. Oxygenate your wort
After your hot phase and your wort is chilled, there will be very little oxygen left for your yeast to start the fermentation process. Adding more oxygen will help get your fermentation going. One method is adding some water from the tap but this dilutes your wort, which will reduce your ABV and dilute the flavor of your beer. The preferred method is using an oxygenation kit, which is a small investment for great tasting beer.
6. Buy carboy handles
This is a very inexpensive accessory to minimize the chances of spilling, slips, and mess when you're moving your carboys. Especially, when they're large and heavy, the slick surface of a carboy can be difficult to carry around. For only several dollars carboy handles allow you to properly grip your carboy and allow you to easily move and clean your carboys.
7. Get a wide mouth carboy
After so many years brewing with a traditional carboy, we found that having a wider opening is very beneficial. A wide mouth carboy is significantly easier to clean, they're easy to carry, and easy to extract liquid from. This one also comes with a built in airlock and date tracker to ease the fermentation process. Learn more about the difference among fermentation vessels in our article here.
8. Bottle over your dishwasher
While we recommend kegging your brews because kegs maintain the quality of your brews for much longer and dispensing them through a kegerator is the best way to enjoy your brews, bottling your beer over your dishwasher will reduce your mess. With the door of your dishwasher open, place your bottling bucket on top of the counter immediately above your dishwasher and fill your beer bottles on the open door. Any spillage simply gets channeled into the dishwasher when you close the door eliminating any mess and cleanup.
9. Prepare yourself for boil-overs
When you're a beginning homebrewer, boil-overs are inevitable but you can always prepare yourself for them and minimize the exhausting cleanup session that is bound to follow. It only takes 2 minutes to prevent hours of cleanup. Simply remove your burners from the stovetop and place a layer of aluminum foil all over your stove, letting your burners poke through the foil. When the kettle boils over, you can just remove all the foil and your cleanup is done!
10. Invest in a good sanitizer
It is important to prevent contamination from your previous brew, which means you need to clean all your equipment very thoroughly. Using a high quality sanitizer will help breakdown residue and bacteria build up that can be detrimental to your next brew. Brewing is a delicate process and even traces of residue can affect your resulting brew.
Need help homebrewing?
We've got you covered with supplies, equipment, and advice! Our team of experts have been working with professional and homebrewers for over two decades. Give our team a call at 800-710-9939.